How to auto deploy from Gitlab to VPS with Docker Swarm
When working with the dynamically changing websites, it's crucical to have own CI/CD process. This way you can speed up the delivery of the product from development to the end customers. Nowadays, multiple Git hosting services are providing custom CI/CD pipelines, which can be extended as you like. For this post, let's take Gitlab as an example of hosting provider.
Docker swarm configuration
Docker swarm, in short, is a way how to orchestrate your docker containers. Within the swarm stack you can define decentralization and optimize your scaling. For this tutorial, let's define some sample swarm by executing following commands:
docker swarm init --advertise-addr <your_ip_address> # this command outputs swarm join command
docker swarm join --token <token> <ip_address> # replace it with the command above
Next, we will need to create a docker compose file, which can be updated from the pipeline. You can use following example as the starting point:
version: '3.7'
services:
  # ... other services
  node_container:
    image: $DOCKER_IMAGE # necessary for dynamic substitution of the image
    ports:
      - "3000:3000" # modify it with your own ports which the application is listening to
    deploy: # necessary to provide the behaviour for updating the stack
      update_config:
        order: start-first
        failure_action: rollback
        delay: 10s
      rollback_config:
        parallelism: 0
        order: stop-first
      restart_policy:
        condition: any
        delay: 5s
        max_attempts: 3
        window: 120s
With the minimal setup above, let's try to spin up the server with the following command:
docker stack deploy -c /path/to/compose --with-registry-auth gitlab-automation-example
Gitlab runner
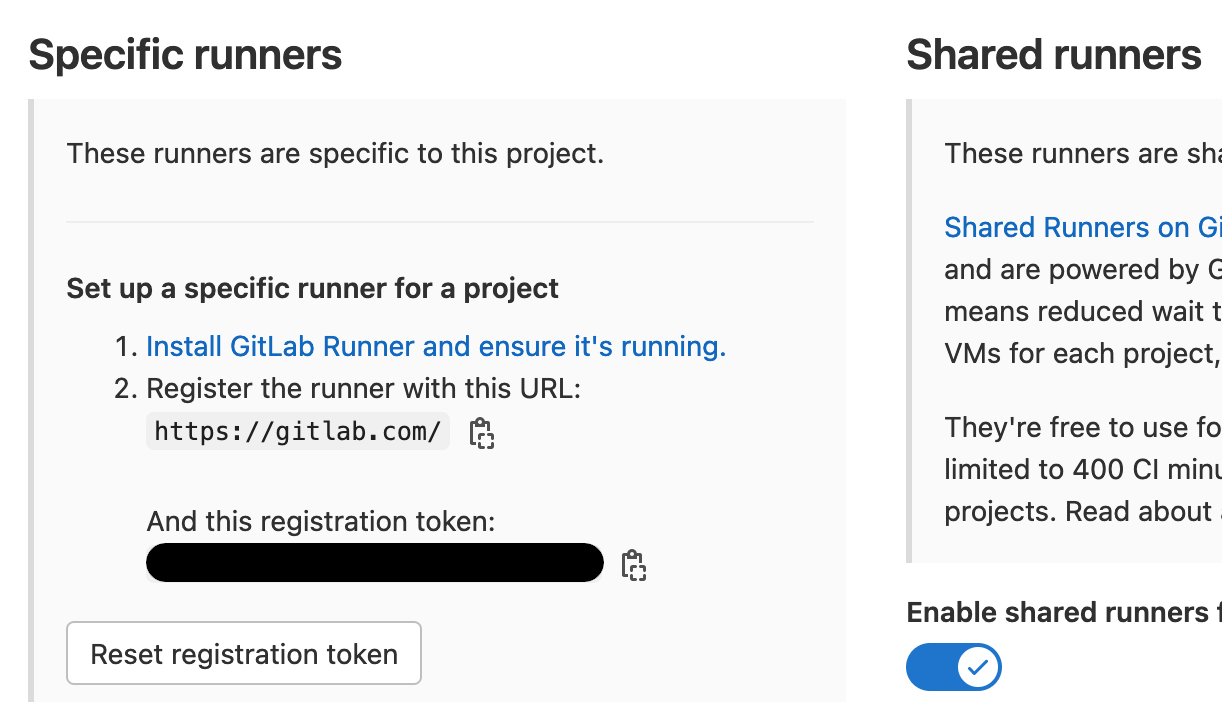
After successfully finishing previous section, you should already have a spined up compose with the microservices. Let's proceed with this process by installing the Gitlab runner and configuring it on your VPS. You should follow Gitlab documentation for installation of the Gitlab runner here But in case you are using Ubuntu/Debian, you can just copy-paste following commands:
curl -L "https://packages.gitlab.com/install/repositories/runner/gitlab-runner/script.deb.sh" | sudo bash
sudo apt-get install gitlab-runner
After this, go to your project settings and copy-paste token and URL for your use case

sudo gitlab-runner register -n \
  --url https://gitlab.com/ \
  --registration-token REGISTRATION_TOKEN \
  --executor shell \
  --description "My Runner"
sudo usermod -aG docker gitlab-runner
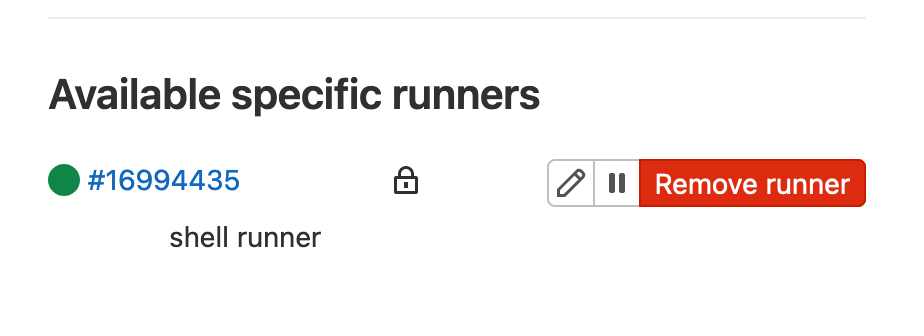
If you will reload page on Gitlab, you should see, that your runner should be listed under
"Available specific runners"

.gitlab-ci.yml
The final step to compile your project is to construct the .gitlab-ci.yml. The complete guide is located here, but you can read example here and follow it to construct your own.
image: docker:20.10.16

variables:
 GIT_DEPTH: 1 # To keep the .git folder small enough, let's limit shallow to 1 https://docs.gitlab.com/ee/ci/pipelines/settings.html#limit-the-number-of-changes-fetched-during-clone

stages: # this instructions indicates the amount and order of steps in your pipeline
  - build
  - deploy

build-docker-image:
  stage: build
  variables:
    IMAGE_TAG: $CI_REGISTRY_IMAGE:$CI_COMMIT_SHORT_SHA
  script:
    - echo "Building Docker image $IMAGE_TAG ..."
    - echo "Credentials $CI_REGISTRY_USER - $CI_REGISTRY_PASSWORD ${CI_REGISTRY}"
    - docker login -u $CI_REGISTRY_USER -p $CI_REGISTRY_PASSWORD ${CI_REGISTRY}
    - docker build -t $IMAGE_TAG .
    - docker push $IMAGE_TAG
    - docker system prune --force

deploy:
  stage: deploy
  variables:
    IMAGE_TAG: $CI_REGISTRY_IMAGE:$CI_COMMIT_SHORT_SHA
  script:
    - echo "Updating the container..."
    - docker login -u $CI_REGISTRY_USER -p $CI_REGISTRY_PASSWORD ${CI_REGISTRY} # In order to fetch the necessary image, you should login to gitlab registry beforehand
    - DOCKER_IMAGE=$IMAGE_TAG docker stack deploy -c /home/gitlab-runner/deploy/compose.yml --with-registry-auth gitlab-automation-example # replace "gitlab-automation-example" with your own service created in previous steps
    - docker container prune --force
    - docker image prune --force # this ensures that after building of the image, we clean everything after ourselves
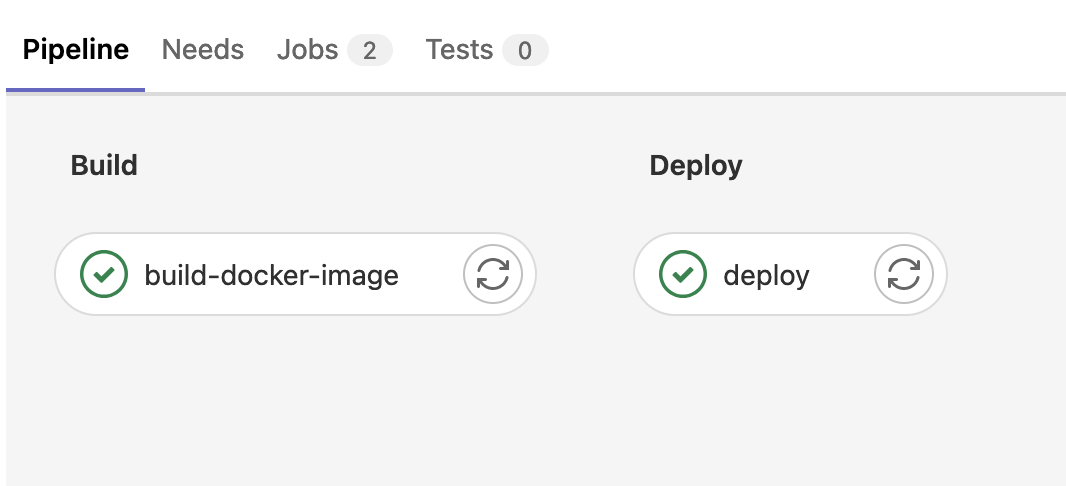
If you have followed tutorial step by step, in the end you should be having following picture with your pipeline configuration:

Photo by Lukas: https://www.pexels.com/photo/boats-near-dock-296242/
